


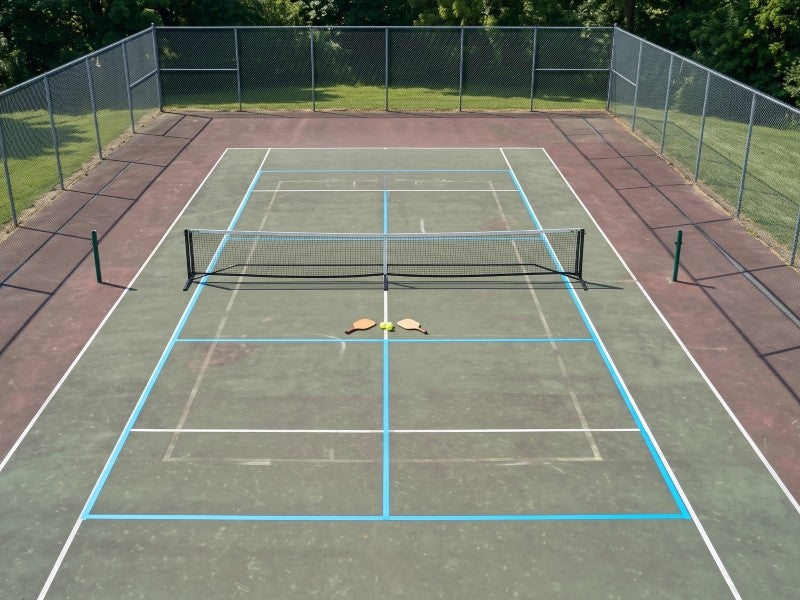
The sport of pickleball is experiencing unprecedented growth, but players everywhere are running into the same frustrating roadblock: a massive shortage of dedicated pickleball courts. Meanwhile, tennis courts sit empty in public parks, HOA communities, and local clubs.
This comprehensive guide is designed to eliminate the guesswork. Whether you are a casual player looking for a quick weekend setup or a community manager planning a semi-permanent conversion, we will show you exactly how to play pickleball on a tennis court.
Understanding the Dimensions: Tennis vs. Pickleball Courts
To successfully lay out a pickleball game on a tennis court, you first need to understand the fundamental geometric differences between the two sports. You cannot simply guess or "eyeball" the boundaries if you want a legitimate, competitive game.
Standard Tennis Court Dimensions
A standard tennis court is massive compared to a pickleball court.
- Total Playable Area: 78 feet long and 36 feet wide (for doubles play).
- Net Height: 36 inches at the center strap, rising to 42 inches at the side posts.
- Total Pad Size: The entire fenced-in concrete or asphalt pad for a standard tennis court is usually 120 feet long and 60 feet wide, designed to give players plenty of room to run past the baselines.
Exact Pickleball Court Dimensions
A pickleball court is incredibly compact, which is why it is so easy to fit onto an existing tennis pad.
- Total Playable Area: 44 feet long and 20 feet wide (this size remains the exact same for both singles and doubles play).
- The Non-Volley Zone (The Kitchen): This is the most critical area of the court. It extends exactly 7 feet from the net on both sides.
- Net Height: 34 inches at the center strap, and 36 inches at the sidelines.
The Overlap Challenge: Why You Can’t Just Use Tennis Lines
A common mistake beginners make is trying to use the existing tennis service boxes as a makeshift pickleball court. Do not do this.
A tennis service box is 21 feet deep and 13.5 feet wide. A half-court in pickleball is 22 feet deep and 20 feet wide. If you play using tennis lines, the court will be far too narrow, the baseline will be too short, and most importantly, you will not have a Non-Volley Zone (Kitchen) line. Playing without a properly measured Kitchen completely ruins the strategic mechanics of pickleball. You must create your own distinct lines.

3 Ways to Layout Pickleball Courts on a Tennis Court
Because a standard tennis pad (120' x 60') is so large, you have multiple options for how to arrange your pickleball courts. The right choice depends on how many players you have, what equipment you own, and whether the setup is temporary or permanent.
Layout Option 1: The 1-to-1 Setup (One Pickleball Court per Tennis Court)
This is the absolute easiest and fastest way to get a game started, making it perfect for quick practice sessions or casual singles play.
- How it works: You build your pickleball court exactly in the center of the tennis court, using the existing tennis net as your pickleball net.
- The Pros: You do not need to purchase or carry a heavy portable pickleball net. You simply measure out your 44' x 20' boundaries utilizing the center point of the tennis net.
- The Cons: It wastes a tremendous amount of space. Furthermore, the tennis net is 36 inches high in the center (instead of the required 34 inches for pickleball), and the edges of the tennis net rise to 42 inches, which will unnaturally block wide passing shots that would normally be legal in pickleball.
Layout Option 2: The 1-to-2 Setup (Two Courts Sideways)
If you are hosting a family gathering or a small club event, splitting the tennis court in half allows eight people to play simultaneously.
- How it works: Instead of playing across the tennis net, you ignore the tennis net entirely. You set up two portable pickleball nets on either side of the tennis net, running parallel to it. You are essentially playing "sideways" on the tennis court.
- The Pros: Excellent use of space. Since you are using portable pickleball nets, the net height will be 100% accurate (34" in the middle, 36" on the sides), providing a much more authentic game experience.
- The Cons: You must invest in two high-quality portable pickleball nets. You also have to draw completely new lines for two full courts.
Layout Option 3: The 1-to-4 Setup (Four Courts for Maximum Capacity)
This is the ultimate layout for Homeowner Associations (HOAs), community centers, and commercial tournaments looking to maximize player capacity. A standard 120' x 60' tennis pad can technically hold four complete pickleball courts.
- How it works: The tennis net is completely removed. Four portable pickleball nets are set up—two on each side of the tennis court's center line.
- Safety & Buffer Zones: When cramming four courts onto one pad, safety is the primary concern. You must ensure there is adequate space between the courts to prevent players from colliding. Industry standards recommend a minimum of 10 feet between baselines and at least 8 feet between sidelines. While tight, a 120' x 60' pad accommodates this mathematically, transforming a space meant for 4 tennis players into an arena for 16 pickleball players.
- The Pros: Maximum efficiency and community engagement.
- The Cons: Requires a significant investment in portable nets, highly precise measuring, and ideally, permanent custom paint lines to avoid chaotic visual clutter.
Step-by-Step Guide: How to Play Pickleball on a Tennis Court
Once you have chosen your layout (1-to-1, 1-to-2, or 1-to-4), it is time to physically set up the court. Follow these expert steps to ensure accuracy and protect the expensive tennis surface.
Step 1: Adjusting or Replacing the Net
Your first obstacle is the net. As established, a tennis net is too high for regulation pickleball. You have two scenarios to solve this:
- Scenario A: Lowering the Tennis Net (For 1-to-1 Layouts). If you are playing directly across the existing tennis net, you must lower the center. Most tennis nets have an adjustable center strap. Loosen this strap until the center of the net measures exactly 34 inches from the ground. Note: You cannot lower the outer posts (which are 42 inches), so you will just have to play with artificially high sidelines.
- Scenario B: Using Portable Pickleball Nets (For 1-to-2 or 1-to-4 Layouts). If you are ignoring the tennis net, you need a portable pickleball net. When shopping for one in 2026, look for powder-coated steel frames and a heavy base to withstand outdoor wind on the tennis pad. Set the portable net up first—it will act as the anchor point for all your measurements.
Step 2: Choosing the Right Court Lines (CRITICAL)
This is where most beginners make a catastrophic mistake. Never use duct tape or cheap masking tape on a tennis court. Traditional tennis courts are coated with specialized acrylic layers (like Plexipave). Strong adhesives will rip this acrylic color coating right off the concrete when you remove the tape, causing thousands of dollars in permanent damage.
Instead, choose one of these safe options:
- Throwdown Markers (Temporary): These are flat, heavy rubber corners and lines that simply lay on the ground. They are the fastest, safest, and most respectful way to set up a quick game.
- Specialty Court Tape (Semi-Temporary): If you want solid lines, you must use specialized vinyl court tape (or high-quality painter's tape with low-tack adhesive). Press it down lightly. Always remove the tape immediately after you finish playing; baking it in the hot sun will make it stick permanently.
- Chalk (Quick & Easy): Standard sidewalk chalk is safe for acrylic courts and washes away with the next rain. It is cheap but may get smudged by foot traffic during a rigorous match.
- Custom Paint Lines (Permanent): For HOA or community conversions, hire a professional to paint permanent pickleball lines. The industry standard is to use a contrasting color—like light blue or yellow—so it does not confuse the white tennis lines.
Step 3: Measuring and Marking the Boundaries
To draw a perfect 44' x 20' court, you need a 50-foot tape measure and two people. Here is the most efficient sequence:
1. Start at the Net: Find the exact center of your net. Measure 10 feet out to the left and 10 feet out to the right to establish your 20-foot width.
2. Mark the Kitchen (Non-Volley Zone): From the net, measure exactly 7 feet straight back on both sides. Draw a line across the 20-foot width. This is your Kitchen line.
3. Mark the Baselines: From the net, measure exactly 22 feet straight back on both sides. Draw your baseline across the 20-foot width.
4. Connect the Sidelines: Connect the edges of your Kitchen line and Baseline to form the outer boundaries. Finally, draw a center line from the Kitchen line to the Baseline to divide the right and left service areas.

Essential Gear for Tennis-Court Pickleball
When you transition to playing on a hard acrylic tennis court, your equipment needs to adapt to the environment.
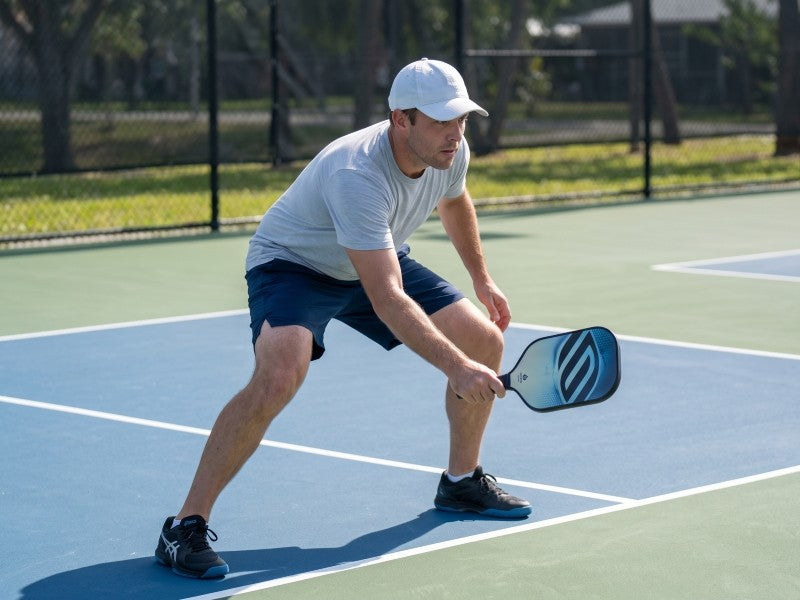
- The Right Shoes: Do not wear running shoes. The acrylic grit of a tennis court requires flat, durable outsoles with intense lateral support to prevent rolled ankles. Dedicated tennis shoes or hard-court pickleball shoes are mandatory.
- Outdoor Pickleballs: Pickleballs come in two varieties. Because a tennis court is a hard outdoor surface exposed to the wind, you must use outdoor balls (typically featuring 40 smaller holes and harder plastic, like the Franklin X-40 or Dura Fast 40). Indoor balls will fly erratically and crack quickly on this surface.
- All-in-One Portable Kits: If you plan on converting tennis courts frequently, invest in an all-in-one kit that includes a regulation-size portable net, four paddles, outdoor balls, and rubber throwdown markers in a single duffel bag.
Frequently Asked Questions (FAQs)
Q: Is a tennis net the same height as a pickleball net?
No. A standard tennis net is 36 inches high in the center and 42 inches at the posts. A regulation pickleball net is 34 inches in the center and 36 inches at the posts.
Q: Can I use chalk to draw a pickleball court on a public tennis court?
Generally, yes. Standard sidewalk chalk is water-soluble and will not permanently stain an acrylic tennis court. However, always check local park regulations first, as some municipalities ban marking courts with any material to maintain a pristine aesthetic.
Q: Does playing pickleball ruin the tennis court surface?
Playing the game itself does not ruin the surface—pickleball shoes and plastic balls are perfectly safe for acrylic hard courts. What does ruin the surface is using improper, high-tack adhesive tape (like duct tape) to mark boundaries, which can peel the expensive color coating off the concrete.
Conclusion
Understanding how to play pickleball on a tennis court is the ultimate life hack for anyone struggling to find a place to play. The robust, flat surface of a tennis pad provides the perfect foundation for a high-quality pickleball match.
By mastering the layout dimensions, utilizing portable nets or center-strap adjustments, and strictly using safe marking tools like rubber throwdowns or specialized court tape, you can instantly transform unused real estate into a hub of pickleball action.

Leave a comment
This site is protected by hCaptcha and the hCaptcha Privacy Policy and Terms of Service apply.