
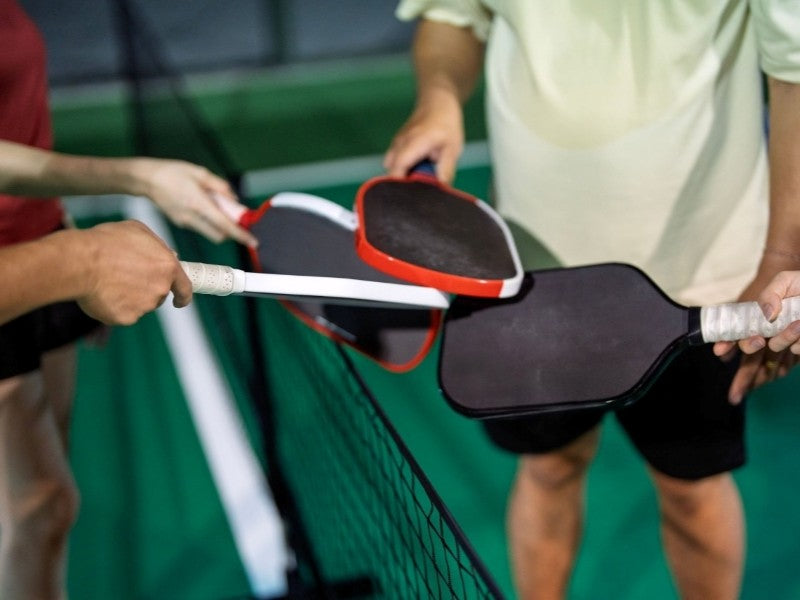
A pickleball paddle’s grip plays a central role in comfort, control, and consistency. Over time, frequent play, sweat absorption, friction, and environmental exposure cause the grip to break down. The results are familiar to nearly every player: slipping during rallies, reduced tactile feel, pressure points, or wrist fatigue. A worn-out grip not only disrupts performance but can also influence stroke mechanics and even contribute to avoidable strain injuries.
While many players replace overgrips regularly, fewer take the time to properly replace the main paddle grip, assuming it requires special tools or professional service. In practice, a grip replacement is an accessible DIY task—one that, when executed correctly, can significantly elevate playing comfort and overall paddle responsiveness.
How to Choose the Right Replacement Grip
Selecting the correct replacement grip affects comfort, durability, and technical performance. The following dimensions provide a structured evaluation method for any player.
Material Types and Performance Characteristics
PU Synthetic (Polyurethane)
- Most common in modern paddles.
- Balances tackiness, cushioning, and moisture management.
- Offers predictable performance and moderate durability.
Foam-Backed Grips
- Adds significant cushioning.
- Beneficial for players with grip fatigue or sensitivity to vibration.
- Slightly reduces tactile feedback.
Rubberized or Elastomer-Based Grips
- High durability and secure, rubbery feel.
- Less breathable.
- Suitable for players prioritizing firm grip stability.
Fabric or Cloth-Base Wraps
- Excellent for sweat-heavy environments due to superior absorption.
- Requires more frequent replacement.
- Offers unique tactile feel favored by some tennis background players.
Gel or Silicone-Infused Grips
- Enhanced vibration dampening.
- Heavier and thicker.
- Useful for elbow or wrist sensitivity but may alter paddle balance.
Thickness and Handle Diameter
Thickness directly affects paddle control and ergonomics.
Thicker Grip:
Increases comfort and reduces wrist strain for players with larger hands.
May slightly limit wrist whip during topspin strokes.
Thin Grip:
Enhances sensitivity, allowing finer angle adjustments.
Ideal for control-oriented players needing quick hand transitions at the kitchen line.
To evaluate ideal diameter, players may use the “natural hold method”:
- Hold the paddle with a relaxed continental grip.
-
Check if your fingertips are close—but not touching—your palm.
This indicates appropriate circumference.
Sweat Absorption and Breathability
Moisture changes the way friction behaves. Players who perspire heavily should prioritize grips with:
- Perforated channels
- Microfiber or cloth layers
- High-tack but breathable PU textures
In contrast, dry-handed players may opt for smoother surfaces with long-term tackiness.
Tackiness and Surface Patterns
Test tackiness by lightly pressing your thumb into the material:
- Strong tackiness helps maintain stability during fast-paced exchanges.
- Mild tackiness provides better touch for players who frequently adjust grip positions mid-point.
Texture variations such as cross-hatch or ribbing add directional traction.
- Ribbed textures promote consistent hand placement.
- Smooth textures favor players who want fluid grip adjustments.
Durability and Maintenance Considerations
Durability depends on material density, sweat exposure, and usage frequency.
Typical lifespan of a main grip: 3–12 months, depending on intensity.
Observe these signs of wear:
- Flattened or shiny sections
- Surface peeling
- Internal shifting or looseness
- Noticeable hard spots
Once any of these appear, replacement is advisable.

Special Requirements (Ergonomic Adjustments)
Some players benefit from additional customization:
- Cushion underlayer for larger grip diameter
- Foam strips to create ergonomic contours
-
Anti-vibration pads strategically placed under the grip
While these adjustments add mass, they can meaningfully improve comfort for players dealing with tendinitis or grip fatigue.
Tools and Materials Required
A proper grip replacement is straightforward when using the right tools:
Essential Items
- Replacement grip
- Sharp scissors or precision utility knife
- Finishing tape (or high-quality electrical tape)
- Isopropyl alcohol wipes for cleaning
- Microfiber cloth
- Soft measuring tape
- Disposable gloves (optional but useful for tacky surfaces)
Optional Tools
- Hairdryer or heat gun (set to low) to slightly activate adhesives
- Small clamps or weights for temporary pressure
- Needle and thread for cloth-style grips
- Mild adhesive remover for stubborn old residue
When the correct tools are prepared in advance, the installation process becomes cleaner, safer, and more precise.
Step-by-Step Installation Guide
This guide covers two main techniques: replacing the primary grip and applying an overgrip. The steps below follow professional installation standards used in racket sports equipment workshops.
A. Replacing the Main (Original) Grip
Step 1: Remove the Old Grip
Carefully peel the existing grip from the handle.
- Start at the top edge and unwrap slowly.
- Avoid cutting deeply; the handle’s composite shell can be damaged by blades.
- Remove any leftover adhesive with alcohol wipes.
Ensure the handle surface is completely clean before moving forward.
Step 2: Inspect the Handle and Butt Cap
Check for:
- Cracks
- Loose butt cap edges
- Gaps between layers of the handle
If issues are present, correct them before installing a new grip to maintain structural integrity.
Step 3: Adjust Thickness if Needed
Players wanting a larger diameter may apply a foam underlayer or a thin base wrap. Ensure the base layer is even to prevent grip ridges.
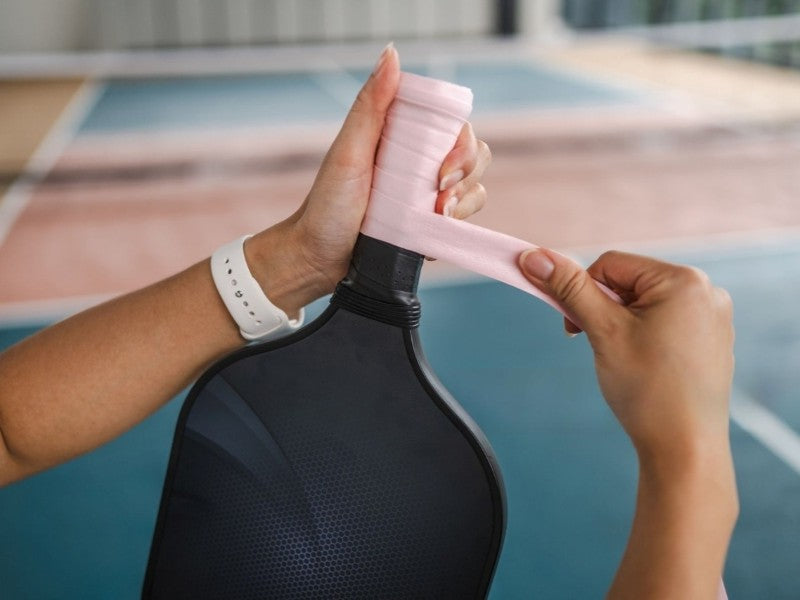
Step 4: Begin Wrapping the New Grip
Most replacement grips have a tapered end.
- Fix the tapered end at the butt cap, aligning it flush with the edge.
- Wrap upward with consistent tension—not too loose, but not stretched excessively.
- Aim for 10–20% overlap on each pass.
- Keep the angle consistent to avoid wrinkles.
This stage determines the final ergonomics, so it should be performed slowly.
Step 5: Finish and Secure the Grip
Cut the excess grip diagonally to create a clean endpoint.
Secure the end with finishing tape, ensuring the tape wraps fully around the handle for firm anchoring.
Optionally, use a hairdryer for 10 seconds to warm adhesive points and improve bonding.
Step 6: Conduct the Final Inspection
Check the grip for:
- Smooth, wrinkle-free layers
- Even diameter throughout
- Firm adhesion with no shifting spots
- Comfortable alignment with natural finger placement
If imperfections exist, they are easiest to correct immediately after installation.
B. Applying an Overgrip (Secondary Grip Layer)
Step 1: Position the Overgrip
Start slightly above the butt cap to avoid unnecessary bulk.
If the overgrip has a non-adhesive tail, secure it temporarily with your thumb during the first wrap.
Step 2: Wrap With Light Tension
Because overgrips are thinner, they rely more heavily on even tension.
- Maintain consistent pressure.
- Use minimal overlap (typically 3–10%).
- Avoid overstretching, which shortens lifespan.
Step 3: Finish the Wrap
Trim excess material cleanly and apply the finishing tape supplied with the overgrip.
Ensure the tape does not interfere with your natural hand placement.
Step 4: Layering Option
Players seeking increased thickness may apply multiple overgrips, but they should assess weight changes and handle feel after each layer.
Common Mistakes, Troubleshooting, and Corrective Techniques
Even experienced players make errors during grip replacement. Understanding these issues and how to correct them ensures the installation remains secure, comfortable, and durable.
Common Mistakes and Their Consequences
1. Uneven Overlap
Irregular spacing—either too much or too little—creates bumps and pressure points. This reduces comfort and may affect the way the paddle rotates during volleys or drives.
2. Overstretching the Grip
Pulling the grip too tightly causes premature thinning, quick wear, and potential tearing. It also creates inconsistent tackiness across the surface.
3. Wrinkles or Air Pockets
Small wrinkles often feel insignificant during installation but become noticeable during long rallies. They interfere with tactile feedback and can accumulate sweat.
4. Loose Finishing Tape
Inadequately secured finishing tape may peel after minimal use, causing the grip’s end to unravel.
5. Leaving Adhesive Residue
Old adhesive that is not removed completely results in an uneven surface, preventing the new grip from adhering correctly.
6. Using Incorrect Tools
Utility knives without proper control or dull scissors can damage the paddle handle or cause jagged cuts.
Troubleshooting and Corrective Solutions
1. Fixing Wrinkles
If wrinkles appear within the top half of the handle:
- Unwrap slowly to the affected area.
- Rewrap with a gentler angle and balanced overlap.
- Apply light tension only; avoid pulling aggressively.
2. Removing Persistent Adhesive
Use isopropyl alcohol and a microfiber cloth.
Avoid acetone or industrial solvents—they may weaken polymer or composite handle structures.
3. Tightening a Loose Grip
If the grip shifts slightly while playing:
- Reapply finishing tape.
- Add a single wrap of underlayer tape at the butt cap to increase friction.
- If shifting persists, rewrap the entire grip with more consistent tension.
4. Solving Handle Diameter Issues
If the new grip feels too large:
- Remove foam underlayers.
- Switch to a thinner replacement grip or rely on overgrip layering instead.
If it feels too small:
- Apply a thin foam underlayer.
- Add a second overgrip to increase diameter.
5. Preventing Moisture Accumulation
Players with heavy perspiration can:
- Choose perforated or microfiber grips.
- Use rosin or a sweat-absorbing wristband.
- Replace overgrips more frequently to avoid slippery buildup.

Frequently Asked Questions (FAQ)
1. How often should I replace my paddle grip?
Most players replace the main grip every 3–12 months, depending on usage intensity and sweat levels. Overgrips may require weekly or even daily replacement.
2. What is the difference between a grip and an overgrip?
· A grip is the primary layer attached to the handle.
· An overgrip is a thin secondary layer used for sweat absorption, tackiness, or temporary adjustments.
3. How do I know if my grip size is correct?
When holding the paddle naturally, your fingertips should be close to your palm without pressing into it. Too small a grip can strain the wrist; too large reduces control.
4. Will adding more layers affect paddle balance?
Yes. Additional layers slightly increase handle weight, which may shift balance toward the handle. Most players adjust quickly, but competitive athletes may prefer controlled modifications.
5. What is the safest way to remove sticky residue?
Use isopropyl alcohol or adhesive-removal wipes designed for sports equipment. Avoid acetone and industrial solvents.
6. Can I layer multiple overgrips?
Yes, but it increases handle diameter. Players seeking cushioning or wrist relief often use two layers.
7. Should I heat the grip during installation?
Gentle warming can improve adhesion but is optional. Use low heat only.
Comparison Tables and Decision Tools
|
Grip Material |
Key Advantages |
Limitations |
Best For |
|
PU Synthetic |
Balanced tackiness, durability |
Moderate sweat absorption |
Most players |
|
Foam-Backed |
Excellent cushioning |
Less tactile feedback |
Players with hand fatigue |
|
Rubber/Elastomer |
High durability, firm feel |
Low breathability |
Power-focused players |
|
Fabric/Cloth |
Superior sweat absorption |
Shorter lifespan |
Humid climates, sweaty hands |
|
Gel/Silicone-Infused |
Vibration dampening |
Adds weight/thickness |
Players with elbow/wrist issues |
Leave a comment
This site is protected by hCaptcha and the hCaptcha Privacy Policy and Terms of Service apply.