


Pickleball is booming. It’s no longer merely a backyard hobby; it has become one of the world’s fastest-expanding sports. If you’re passionate about the game and tired of waiting for open courts at public facilities, building your own pickleball court can be a smart and fulfilling decision.
Why Build a Pickleball Court?
Owning a personal pickleball court provides convenience, flexibility, and ample enjoyment.
You can play anytime you want without worrying about crowds, and it becomes a hub for social gatherings and family activities. For property owners or commercial facilities, a dedicated court can increase property value and attract more visitors.
You’ll also enjoy:
· A professional-grade playing experience.
· The ability to customize for your style of play.
· More time on the court, less time waiting.
It represents an investment in your property, well-being, and joy.

Know the Standard Dimensions
Before you even break ground, it’s critical to understand the official specifications for a pickleball court.
The playing area itself is a rectangle measuring:
20 feet wide by 44 feet long (6.1m x 13.41m)
This dimension is identical for singles and doubles play. But for safety and comfort, you’ll want additional space around the court:
Recommended total area: 30x60 feet (9.14m x 18.29m)
That extra space — also called the “run-off” or “clearance area” — ensures players can move freely without running into walls, fences, or landscaping. If you have more room, 34x64 feet is even better, giving ample space for spectators, benches, and storage.
1. Indoor or Outdoor?
Your next big decision: build it indoors or outdoors?
Indoor Courts:
· Weather-proof — perfect for year-round play.
· No UV damage to surfaces or net.
· Requires a high-ceiling gym or warehouse space.
· Usually more expensive per square foot.
Outdoor Courts:
· More common and less expensive.
· Great for sunny climates.
· Needs weather-resistant materials.
· May require fencing and drainage systems.
Consider your climate, your available space, and your budget when choosing between the two. Outdoor courts are more common for private and community use, but if you already own indoor space (like a converted barn or gymnasium), an indoor court may be worth the added investment.
2. Choosing the Right Location
Picking the right site is more than just finding a big enough space. Here’s what to look for:
· Level ground: The flatter and more stable your site is, the less prep work is needed.
· Drainage: Avoid low spots that collect water. If unavoidable, plan to install a drainage system.
· Sun orientation: Ideally, the court runs north-south so players don’t have the sun in their eyes.
· Wind protection: Natural windbreaks like trees or fences help keep play enjoyable.
· Accessibility: Make sure players can reach the court easily, with room for paths and maybe even parking.
Check local zoning rules and neighborhood covenants to confirm you’re allowed to build a court on your property.
3. Preparing the Base
Once your location is set, it’s time to prepare the foundation. This step is critical — a poorly built base leads to cracks, puddles, and uneven surfaces down the line.
Steps:
1. Clear the area of grass, rocks, roots, and debris.
2. Excavate about 6–12 inches of soil, depending on your soil type.
3. Compact the ground using a roller or plate compactor to prevent settling.
4. Install a layer of crushed gravel or stone for drainage and stability.
5. Pour and level a concrete slab or asphalt pad.
Concrete is the favored base material due to its sturdiness and low upkeep needs. Ensure the surface has a gentle slope (usually 1%) to facilitate water drainage.
4. Surface Materials
The surface of your court dramatically affects the playing experience. Here are your main options:
· Acrylic-coated concrete: The gold standard for outdoor courts — durable, low-maintenance, and provides great ball bounce.
· Asphalt with acrylic finish: Slightly cheaper, but more prone to cracking over time.
· Modular tile systems: Popular for indoor or portable courts. Easy to install, cushioned for joints, but more expensive.
· Artificial turf: Rare, softer underfoot, but not ideal for ball bounce consistency.
For most players, a concrete base topped with an acrylic sports coating is ideal. You can even customize the surface color — green, blue, red, or combinations — to fit your style.
5. Marking the Court
Once your surface is complete, it’s time to lay out the official lines.
Use high-quality outdoor line paint that can withstand weather and wear. A regulation pickleball court has:
· Baselines (back of the court)
· Sidelines
· Lines marking the non-volley zone (“kitchen”) are positioned 7 feet from the net
· Centerlines dividing service areas
Use chalk lines or a stencil kit to guide your painting. Allow the paint to fully cure before play.
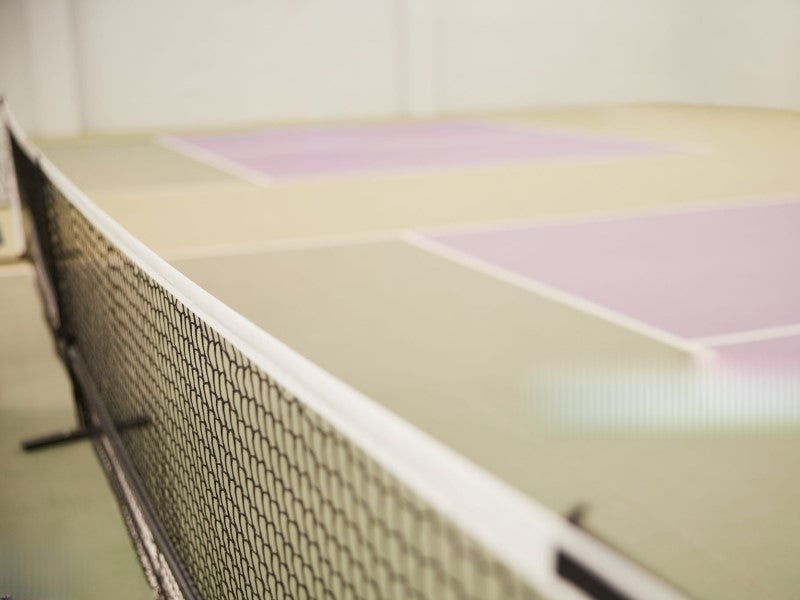
6. Installing the Net
The net system is more than just a net — it also includes the posts and tension system. Regulation specifications:
· Height at the posts: 36 inches
· Height at the center: 34 inches
Permanent posts set into concrete are more stable and professional, but portable nets are an option if you want flexibility or are building a temporary court.

7. Add Accessories
Your court is ready to play — but you can make it even better by adding a few extras:
· Fencing: Keeps balls in play and players safe.
· Lighting: For night games, LED floodlights on poles are ideal.
· Seating: Benches or bleachers for players and spectators.
· Windscreens: Reduce wind and add privacy.
· Shade structures: Protect players from the sun.
These aren’t strictly necessary but enhance your overall experience and add a professional touch.
What Is the Expense of Constructing a Pickleball Court?
The total cost depends on your choices of materials, location, and features. Below is a basic cost breakdown (for a standard outdoor court in the United States):
|
Component |
Typical Cost |
|
Site prep & base |
$4,000–$8,000 |
|
Surface & coating |
$6,000–$12,000 |
|
Net & posts |
$300–$1,000 |
|
Fencing |
$4,000–$8,000 |
|
Lighting |
$3,000–$10,000 |
|
Extras (seating, windscreens, etc.) |
$1,000–$3,000 |
Estimated total: $20,000–$40,000
A DIY project with minimal extras might cost under $15,000, while a premium, professional court can exceed $50,000. Get quotes from multiple contractors if hiring out.
Maintenance Tips
Your court is an investment — keep it in top shape with proper care:
· Sweep debris and leaves regularly.
· Rinse with water to prevent staining.
· Repair cracks or chips promptly.
· Repaint lines every few years.
· Inspect and tighten net hardware as needed.
With basic upkeep, your court can last 15–20 years before needing resurfacing.
Building your own pickleball court is a project that pays off every time you step on it. By following these steps — choosing the right site, building a solid base, selecting the ideal surface, marking it correctly, and adding the right equipment — you’ll end up with a court you can enjoy for years.
Not only will you have a place to improve your skills and stay active, but you’ll also create a space for friends, family, and community members to gather and have fun.
Leave a comment
This site is protected by hCaptcha and the hCaptcha Privacy Policy and Terms of Service apply.